Installing SEBLOD Importer
 SEBLOD Importer is a powerful add-on that allows you to batch import content items from a .csv file in to Joomla and create SEBLOD content items for each. To download SEBLOD importer, visit the
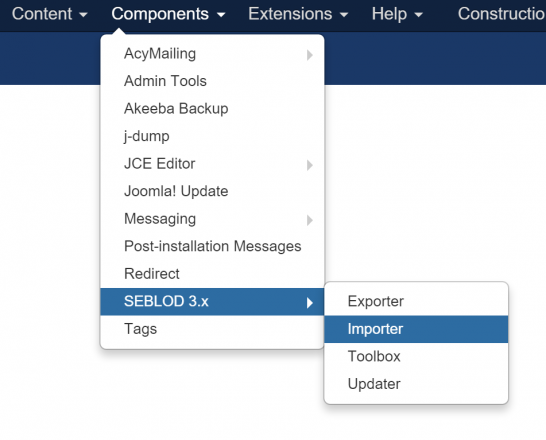
SEBLOD importer download page. Once downloaded, you can install it through the Joomla Extension Manager. Please ensure you have SEBLOD installed before you install this add-on. After it's installed, the Importer add-on will then be available as a sub-menu option under Extensions > SEBLOD > Importer.
SEBLOD Importer is a powerful add-on that allows you to batch import content items from a .csv file in to Joomla and create SEBLOD content items for each. To download SEBLOD importer, visit the
SEBLOD importer download page. Once downloaded, you can install it through the Joomla Extension Manager. Please ensure you have SEBLOD installed before you install this add-on. After it's installed, the Importer add-on will then be available as a sub-menu option under Extensions > SEBLOD > Importer.
Configuration Options
In the Options of the SEBLOD Importer add on, you have some settings for how content will be imported in to your site.
Mode allows you to select if the import is done with AJAX or as a single bulk upload. AJAX is useful for very large uploads which can then be managed in discrete chunks.
Items per AJAX request relates only if you have the "AJAX" mode selected. Here you can specify how many rows in your .csv file should be imported in each request.
CSV Length will needs to be set sufficiently high so it reflects the maximum number of characters each row of your .csv file contains. If you have a large number of columns, please set this to a sufficiently high value so your import of each content item is not cut off. Please note that the higher this value is, the slower your import will be.
Filename - append date in specifed format to string to output file name
Output / mode and folder - whether output files should be downloaded or output to a specified folder
Preparing your .csv import file
SEBLOD importer requires your content to imported through a .csv file. The best way to create this file is using a program like Excel to enter all of your content.
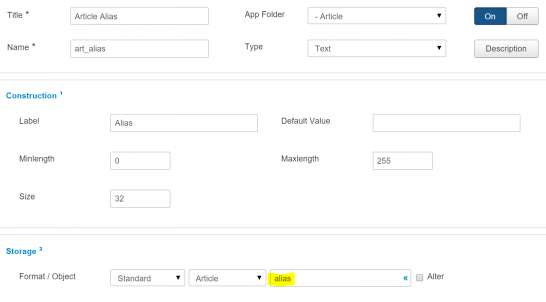 Each column of your CSV file should map directly to a field in your target Content Type. Please note that the column names in your .csv file should reflect the exact database column names, which is the storage name of your field, not the field name (or field alias). Using the example on the left, the name of your .csv column would be "alias" not "art_alias".
Please note that if you include columns in your .csv file that do not coincide with existing fields in your content type, a new Text field will be created and added to your content type. The Storage will be Standard > ' Object' > column_name. The Title will be column name and the Name will be column_name.
Using SEBLOD Importer

The first 2 options are relatively self explanatory and are interconnected. The
Object you select will depend on the type of content you are importing: Articles, Users or Categories. You Content Type selection will be a reflection of the type of content that you are importing. In most cases, you would have already created a SEBLOD content type before wanting to import content, and the fields (or columns) in your .csv file will be a direct reflection of the fields you have set up in your Content Type.
The File to Import upload field is where you select the .csv file you wish to upload
The Separator option is where you select the delimiter used in your .csv file.
Force UTF-8 will convert any non-UTF-8 characters in your .csv file to UTF-8. This will avoid any errors in your database if it only accepts UTF-8 formatting.
Default Values, Settings and Update
The settings in this section will be applied to all of the content items you are uploading. Here you can set the author you want to be associated with all the imported content, the category they should all adopt, and the article status.
Reordering: it is advised to keep this field as "No", as for each row that is imported, there will be an exponential number of queries to the database and will slow performance dramatically.
The "By Key" update option allows you to use your import to override existing content. If you select "ID" you must make sure that your .csv file has an "id" column and the values contained in the rows coincide with existing content items that you wish to override. The same principle applies to "alias" or with a custom field that you enter.
If you do not select a Key, new content items will be created for each row of your .csv file.
Output
Importer will create up to 3 files in the folder set in component options, that will contain:- created.csv - rows that were sucesfully imported and created new record in database
- updated.csv - rows that were sucesfully imported and updated existing record in database based on specified key (Update - By key setting)
- canceled.csv - rows that were not imported due to some error or conflict
If there is nothing to save file will not get created - e.g. on clean import and with all rows created correctly you would only get created.csv.