Introducing List templates
List templates determine the way that the results of your SEBLOD searches are displayed on the page. By default, SEBLOD Core comes with the seb_blog list template installed, which, when enabled, forces you to add your fields to the "item view". The seb_blog template is then configurable to define how many items you want to display per row, and in different configurations. Again, the default here is to show 1 leading item, 2 items at 50 - 50 width, and then 3 items per row for the remainder of the page. The seb_blog is a special list template that doesn't contain any positions in the List View, but instead works alongside the Item View which is where you add your fields. In your Item View, you are able to use a standard Content Template - like seb_one or seb_minima. The link between the List View and the Item View is explained in the next section.
There are other List Templates available other than seb_blog. These templates can be found on the SEBLOD Marketplace.
List View and Item View
Below we have a very basic web page layout. At the bottom left, we have a list of SEBLOD items that are displayed using the List Template. So, each item is displayed as a
<li> within an Unordered List (<ul>) With the List Template, Fields can be added directly to the List View - so you can add the Article Title field directly to the List View, and then you will see a list of article titles.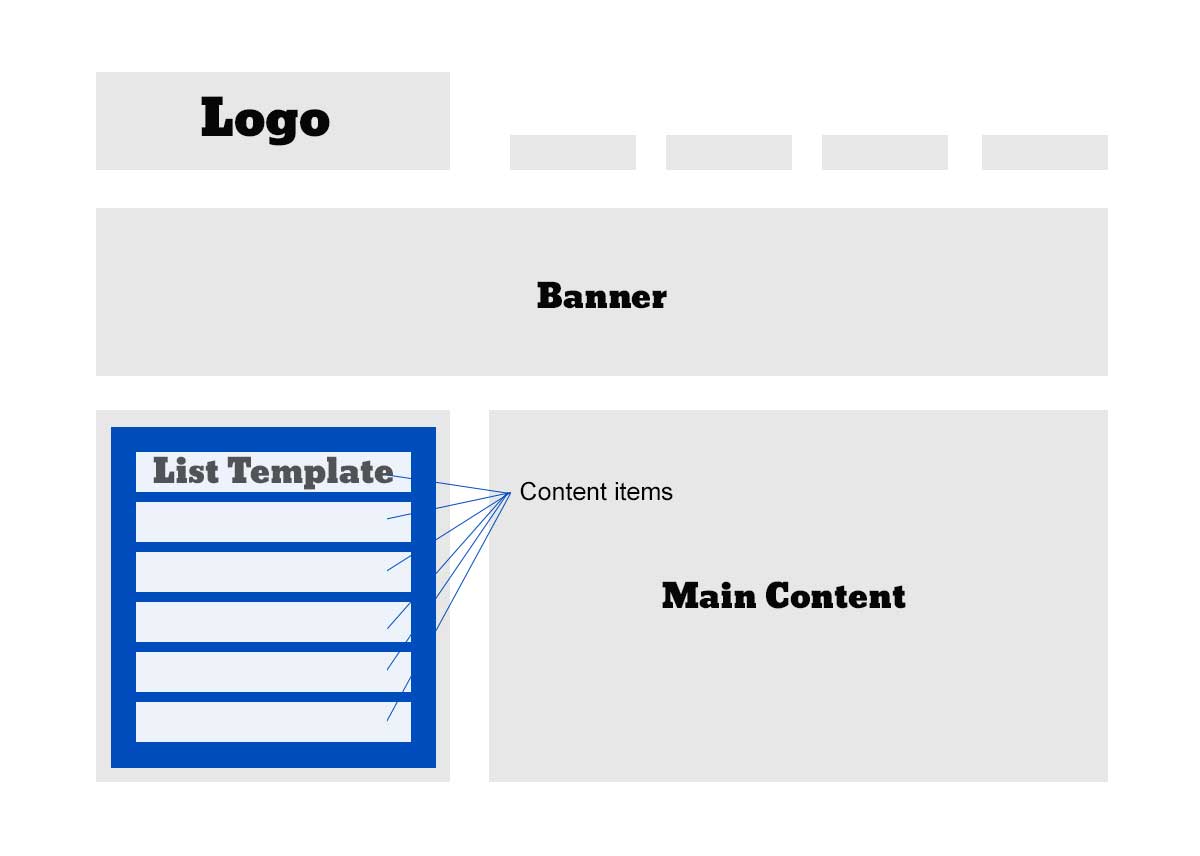
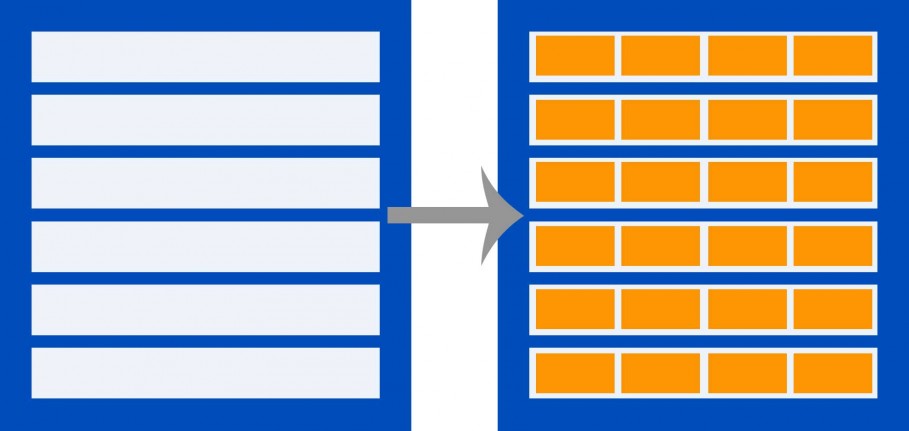
Each white box within the List Template is a Content Item which is rendered within
<li> tags.
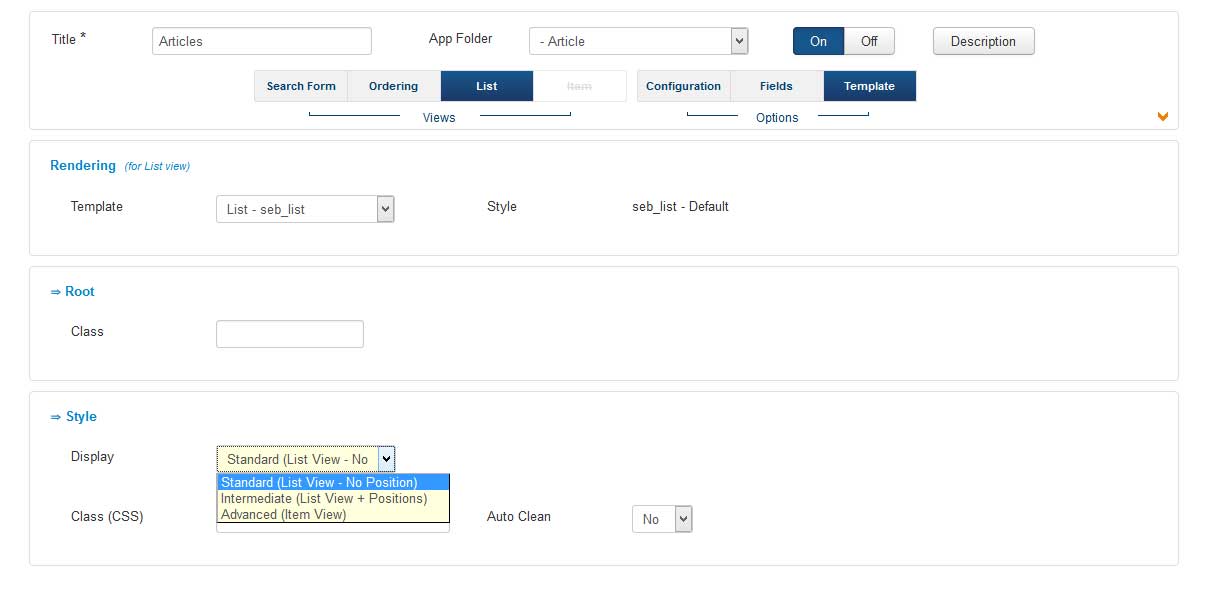
If we set the "Display" to "Advanced", you'll notice that the Item view is enabled, and you can add fields there, instead of the List view. This allows you to take greater control over your list template output by essentially rendering whichever Content Template you choose for the Item View WITHIN the
<li> tags. Below you can see a diagram showing this relationship - where the white boxes are the <li> tags and the orange boxes are the template positions within your Item View template: